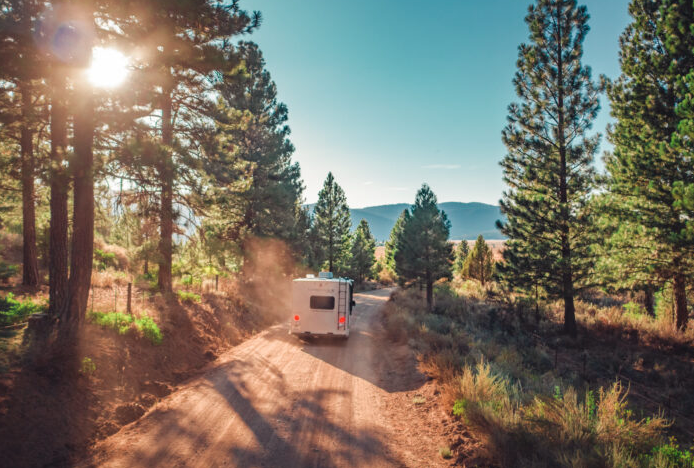
When you’re parked in the middle of nowhere, driving through the mountains, or boondocking miles from cell service, an RV emergency can quickly turn into a stressful situation.
The good news? Most RV emergencies aren’t life-threatening, and knowing a few basic troubleshooting steps can help you stay safe, minimize damage, and get back on the road faster.
This RV Emergency Checklist covers three of the most common RV emergencies:
- Tire blowouts
- Power loss
- Water leaks
Screenshot this checklist to your phone for those moments when Google isn’t an option.
1. RV Tire Blowout: Stay Calm and Stay in Control
A tire blowout is one of the most intimidating emergencies an RVer can experience. While it feels sudden, the most important thing is maintaining control of the RV. Safety organizations and tire experts emphasize that abrupt braking can make the situation worse. Instead, maintain a firm grip on the wheel, keep the RV tracking straight, and move to a safe location before stopping.
What To Do Immediately
✓ Keep Both Hands on the Steering Wheel
The RV may pull sharply toward the damaged tire. Stay focused on maintaining a straight path.
✓ Do NOT Slam on the Brakes
Heavy braking can shift weight onto the damaged tire and make control more difficult.
✓ Maintain Control First
Many RV safety experts recommend maintaining forward momentum until the vehicle is stabilized and under control.
✓ Signal and Move Off the Road
Once stable, gradually slow down and pull onto a safe shoulder or parking area.
✓ Turn On Hazard Lights
Alert other drivers immediately.
✓ Inspect the Damage Safely
Stay away from traffic lanes while assessing damage.
Regular tire inspections, proper inflation, and replacing aging tires before they fail remain the best ways to reduce your chances of experiencing a blowout.

RV Power Loss: When Everything Suddenly Goes Dark
Power issues are among the most common RV problems. The good news is that many can be traced to a tripped breaker, discharged battery, blown fuse, or converter issue.
Before assuming the worst, work through these simple checks.
Step 1: Determine What Power You’ve Lost
Ask yourself:
- Are all outlets dead?
- Are lights still working?
- Is shore power connected?
- Is the battery monitor showing voltage?
The answers will help narrow down the problem.
Step 2: Check the Pedestal or Power Source
If you’re plugged into campground power:
✓ Verify the breaker at the pedestal hasn’t tripped.
✓ Confirm the power cord is fully seated.
✓ Inspect the plug for signs of overheating or damage.
Step 3: Check RV Breakers
Sometimes breakers appear normal even when tripped.
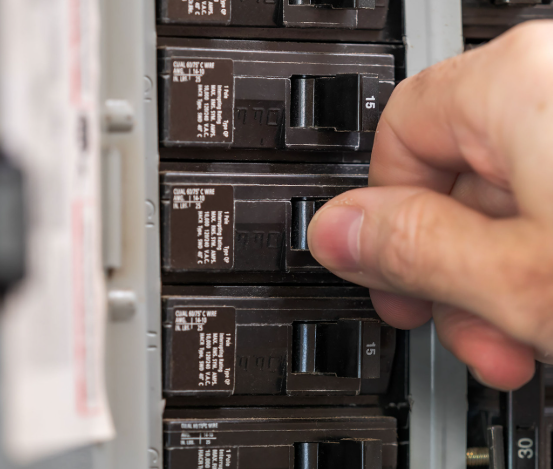
- Turn each breaker completely OFF
- Turn it back ON.
- Check whether power returns.
Step 4: Check Battery Power
Your batteries power many of the RV’s 12-volt systems.
Signs of battery issues include:
- Dim lights
- Dead control panels
- Appliances not responding
- Low voltage readings
A weak battery can create symptoms that look like a larger electrical problem.
Step 5: Inspect Fuses
Blown fuses are common and easy to overlook.
Check:
- Battery fuses
- Converter fuses
- Reverse-polarity fuses
- Inline battery disconnect fuses
If you’ve checked the pedestal, breakers, batteries, and fuses and still can’t identify the problem, it’s time to contact a qualified RV technician. When it comes to electrical systems, it’s always better to be cautious than to guess.
RV Water Leak: Stop the Damage Fast
Water damage is one of the most expensive repairs an RV owner can face. The key is acting quickly.
Even a small plumbing leak can cause extensive damage if water continues flowing unchecked. RV plumbing systems include shut-off valves designed to isolate leaks and stop water flow during emergencies.
Step 1: Shut Off the Water Immediately
If connected to city water:
✓ Turn off the campground spigot.
✓ Disconnect the water hose if necessary.
If using your freshwater tank:
✓ Turn off the water pump.
This is the fastest way to stop additional damage.
Step 2: Identify the Source
Common leak locations include:
- Water heater fittings
- Under sinks
- Toilet connections
- Shower plumbing
- Water pump fittings
- Exterior water hookups
Step 3: Relieve System Pressure
After shutting off the water source:
- Open a faucet.
- Allow pressure to bleed off.
- Close the faucet once pressure is gone.
This helps prevent continued dripping and limits damage.
Step 4: Protect the Area
Use towels, rags, or absorbent materials to remove standing water.
If available:
- Run fans
- Open storage compartments
- Increase ventilation
The faster materials dry, the less chance of long-term damage.
Step 5: Isolate the Problem
Many RVs have localized shut-off valves that allow you to stop water flow to a specific fixture while keeping the rest of the RV operational.
Even if the repair seems minor, keep an eye on the area over the next few days for signs of lingering moisture. Catching a leak early is one of the easiest ways to avoid expensive repairs down the road.
Before You Hit the Road: Build Your RV Emergency Kit
Every RV should carry:
- Tire pressure gauge
- Portable air compressor
- Reflective triangles
- Flashlight
- Spare fuses
- Multimeter
- Basic hand tools
- Electrical tape
- Duct tape
- Adjustable wrench
- Work gloves
- Absorbent towels
- Water leak detector
Being prepared can turn a major emergency into a minor inconvenience.
No one plans for a blowout, power failure, or water leak, but every RV owner should be prepared for one. Understanding the basics of these common emergencies can help you stay calm, protect your RV, and potentially avoid costly repairs.
The best emergency plan is prevention: inspect your tires regularly, monitor your batteries, and keep an eye on your plumbing system before small problems become big ones. Safe travels start with being prepared.


Written By: Brooke Erickson
Some say I am a writer, I like to say I am a storyteller