What “Four-Season” Really Means
“Four-season” on an RV brochure isn’t a magic force field. Insulation levels, window types, and underbelly heating vary widely, and none of it removes the need to prep, monitor, and conserve heat.
If you can avoid prolonged sub-freezing stays, do. If you can’t, the tips below will help you minimize risk and discomfort.
Table of Contents
Tip 1: Respect Electricity — Skip Portable Space Heaters
Tip 2: Control Moisture — Run Dehumidifiers
Tip 3: Add Skirting to Protect the Underbelly
Tip 4: Plan Your Propane (You’ll Use More Than You Think)
Tip 5: Protect Fresh Water & Waste Lines
Tip 6: Seal Drafts & Insulate Openings
Tip 7: Understand RV Windows (R-Values & Reality)
Tip 8: Thermostat Placement & Furnace Use
Tip 1: Respect Electricity & Skip Portable Space Heaters
Bottom line: Portable 1,500W space heaters are a common cause of melted outlets, tripped breakers, and fires. RV wiring and receptacles typically aren’t designed for that continuous load.
- Built-in electric fireplaces are different: they’re on their own dedicated circuit and engineered to stay under long-term load limits.
- If supplemental electric heat is your only option, use the lowest-wattage unit you can find (e.g., 400–750W), run it sparingly, and never plug a heater into a power strip or extension cord.
- Safety hazard aside, adding heat in the living area can trick the thermostat into shutting off the furnace, starving the underbelly of warm air and increasing freeze risk.
Tip 2: Control Moisture & Run Dehumidifiers
Your A/C naturally dehumidifies in summer; your furnace does not. In winter, moisture from people, cooking, and breathing builds quickly.
- First warning sign: window condensation. That’s just the visible tip of the iceberg.
- Use one or more electric dehumidifiers (size to your square footage), and ventilate when cooking and showering. Your goal is to minimize moisture, not necessarily eliminate it.
Tip 3: Add Skirting to Protect the Underbelly
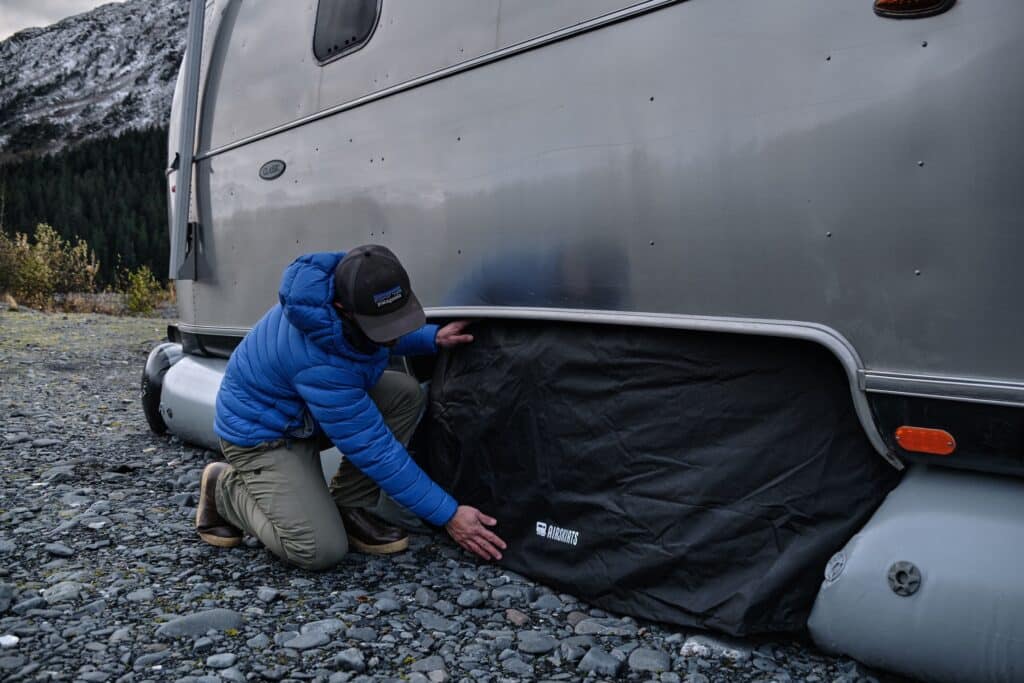
Cold air attacks from below like a bridge deck in winter.
- Avoid hay bales or OSB: they’re flammable and can invite pests.
- Tape-on foil wraps can work, but the adhesive often leaves permanent residue.
- Snap-on fabric skirts insulate well, but require drilling/snaps (many holes = potential leak points).
- Inflatable “air skirt” systems insulate without drilling and store compactly, usually the most effective, but also the most expensive.
Tip 4: Plan Your Propane (You’ll Use More Than You Think)
RVs are not houses; you’ll burn through propane in true winter conditions.
- Higher-BTU furnaces make more heat by burning more fuel.
- Keep a rotation plan for cylinders, know refill hours (especially weekends), and carry backups.
- Expect the furnace to cycle hard—this is normal in cold camping.
Tip 5: Protect Fresh Water & Waste Lines
Don’t assume park water is available all winter, many shut off spigots to protect lines.
- Use a heated fresh-water hose and insulate the spigot.
- If you have on-site sewer, a heated sleeve for the sewer hose helps prevent freeze-ups.
- Tank heaters: most RVs use small 12V warming pads (think “tank warmers,” not heaters); true 110V heating blankets are far stronger but less common. Even with tank heaters, you still need the furnace circulating heat.
Tip 6: Seal Drafts & Insulate Openings
Every opening leaks heat.
- Use purpose-made insulators for vents, skylights, entry doors, and window shades.
- The good news: these products also help in summer by keeping cool air in.
Tip 7: Understand RV Windows (R-Values & Reality)
Walls might be roughly R-7 to R-9; most RV windows are about R-0.7—a thermal hole.
- Common RV “dual-pane” windows are often bonded panes (no gas gap). They’re excellent for noise reduction, not dramatic insulation gains (roughly ~R-1).
- True insulated Euro-style dual-pane windows are better for thermal performance but rarer and pricier.
- Either way, you still need dehumidification to fight condensation.
Tip 8: Thermostat Placement & Furnace Use
Thermostats sit in the main cabin. If you heat that space with plug-ins, the thermostat may shut the furnace off, leaving tanks, lines, and the underbelly cold.
- In freezing weather, prioritize the propane furnace so warm air continues moving through heat ducts and into the underbelly.
Quick Gear Checklist
- Low-wattage supplemental heater (only if unavoidable; never via power strip)
- Dehumidifiers (one large or multiple small units)
- Skirting (preferably inflatable or fitted fabric)
- Heated fresh-water hose + spigot insulation
- Heated sewer hose sleeve (if staying hooked up)
- Tank heaters (know if yours are 12V warmers or 110V blankets)
- Vent/skylight/door insulation plugs and thermal window coverings
- Extra propane cylinders and a refill schedule
FAQs
Can I use a portable space heater in my RV?
It’s strongly discouraged. Most are 1,500W continuous loads, which can overheat RV outlets and wiring. If you must, choose 400–750W, run sparingly, and never use a power strip.
Do dual-pane windows stop condensation?
Not by themselves. They may delay it and reduce noise, but you’ll still need dehumidifiers and ventilation.
If I have tank heaters, can I skip the furnace?
No. Typical 12V pads only “warm.” The furnace is what pushes heat into the underbelly to protect plumbing.
What’s the best RV skirting?
Effectiveness, cost, and install effort vary. Inflatable skirts insulate well without drilling but cost more; snap-on skirts are solid but require hardware; avoid flammable DIY methods.
How do I keep water flowing all winter?
Use a heated hose, insulate connections, and confirm the park keeps water on. Many close spigots in deep cold.
Final Thoughts
Cold camping is absolutely doable, with realistic expectations. Prioritize safety over shortcuts, keep moisture in check, protect the underbelly with skirting, plan your propane, and let the furnace do its job. Do that, and winter RVing goes from miserable to manageable.
Written By: Brooke Erickson
Some say I am a writer, I like to say I am a storyteller